Using Dissect Framework
(in a stupid way)
Overview
What is Dissect?
Dissect is a digital forensics & incident response framework and toolset that allows you to quickly access and analyze forensic artifacts from various disk and file formats, developed by Fox-IT (part of NCC Group).
What you need
- 2 Virtual Machines or if you’re rich 2 PCs. because why not, right?
- One for SIEM
- One for the client machine (I used Windows 11 for the purpose of this testing)
- Acquire and Dissect installers (using Python and Python-PIP)
- Patience (lots of patience)

Sample Usage
-
Create a client virtual machine (Note: Windows with minimum specs).
-
Download the latest Python and Python-PIP in the client virtual machine.
-
Run the Acquire tool with admin privileges. For the uninitiated, here’s the usage.
acquire —profile full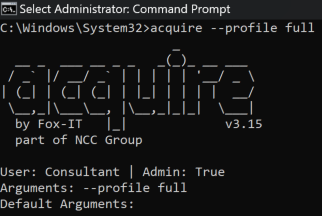
This will create the .tar file inside the directory where the command was executed. For instance, the command was used in ‘C:\Windows\System32’ so the the compressed file were created in the same path.

-
Prep the SIEM.
- Create the index for the Dissect records. I used ‘dissect’ as index name.
- Create a TCP Port in SIEM. Make sure firewall or any security mechanism allows the port specified. I used the ‘tsv’ as source type.
-
Run Dissect.
- Run the command below on the client machine to send all data to SIEM instance.
target-query [tar file created by acquire] -f * | rdump -w splunk://[SIEM IP Address]:[TCP Port]
This will send all the logs from the client machine directly to SIEM instance.For example:
target-query DISSECT_20240911024850.tar -f * | rdump -w splunk://192.168.77.253:1338
- Now, move to SIEM and query the index name to check for incoming logs.
- Run the command below on the client machine to send all data to SIEM instance.
-
Parse each field.
-
Used ChatGPT to create a PowerShell code that will transform the raw log into a regex type field since I can’t find the add-on for it.
Side note: Based on the sample data I had there were 62 different types of log format generated by Dissect, I divided it into three parts: header, unique data format, and the footer. I did it this way since it’ll be redundant to include the header and footer to each parser.

-
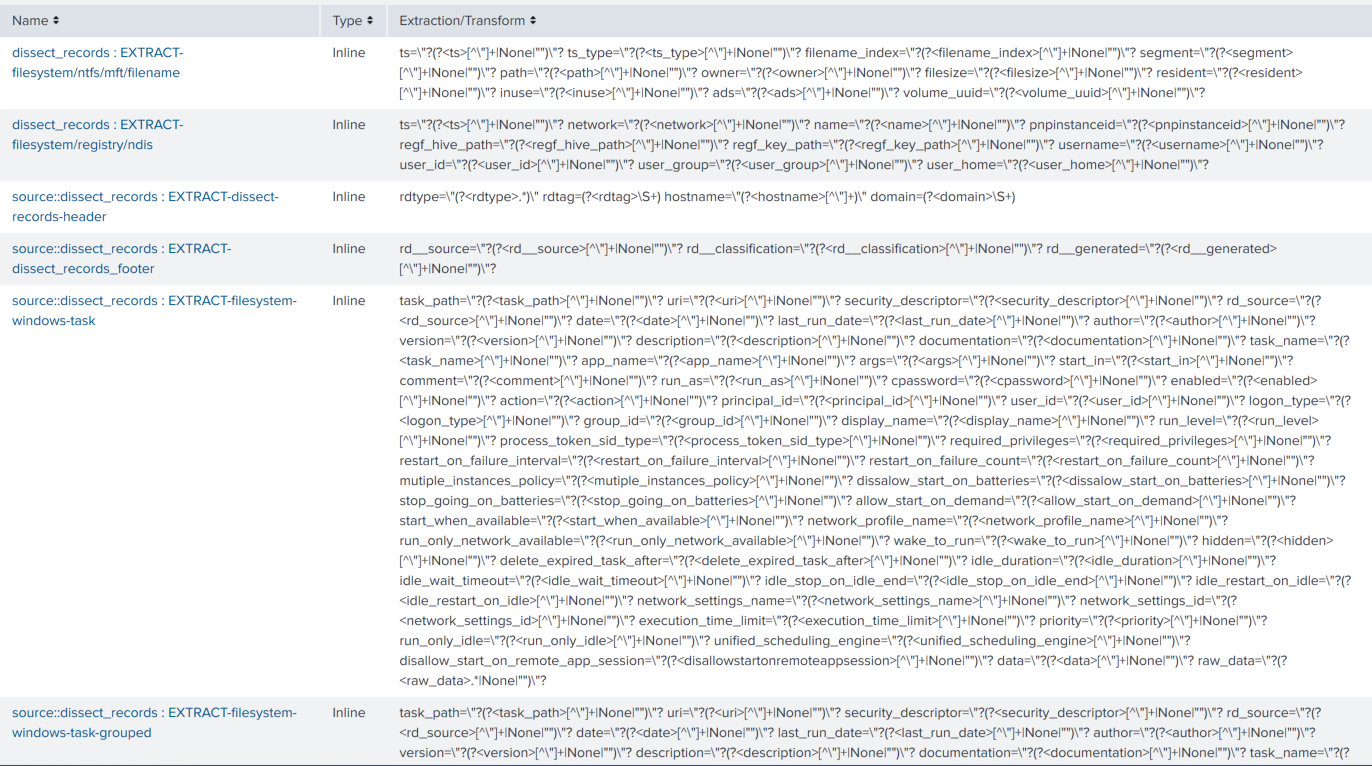
Add the created field parser to props.conf for each type.
- This is what it looks like in SIEM GUI:
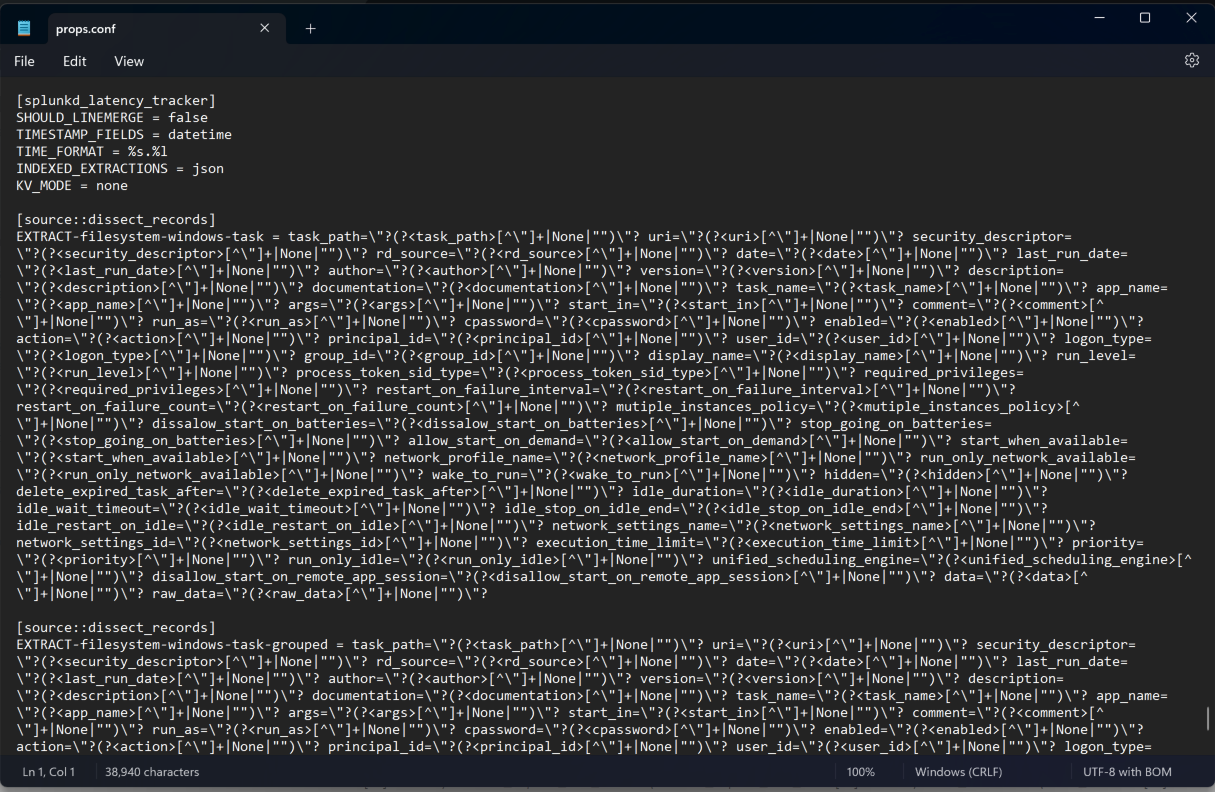
- This is what it looks like in props.conf
- And this is me after doing all these

-
-
Now we can see all the data in SIEM (or as it should be…?)
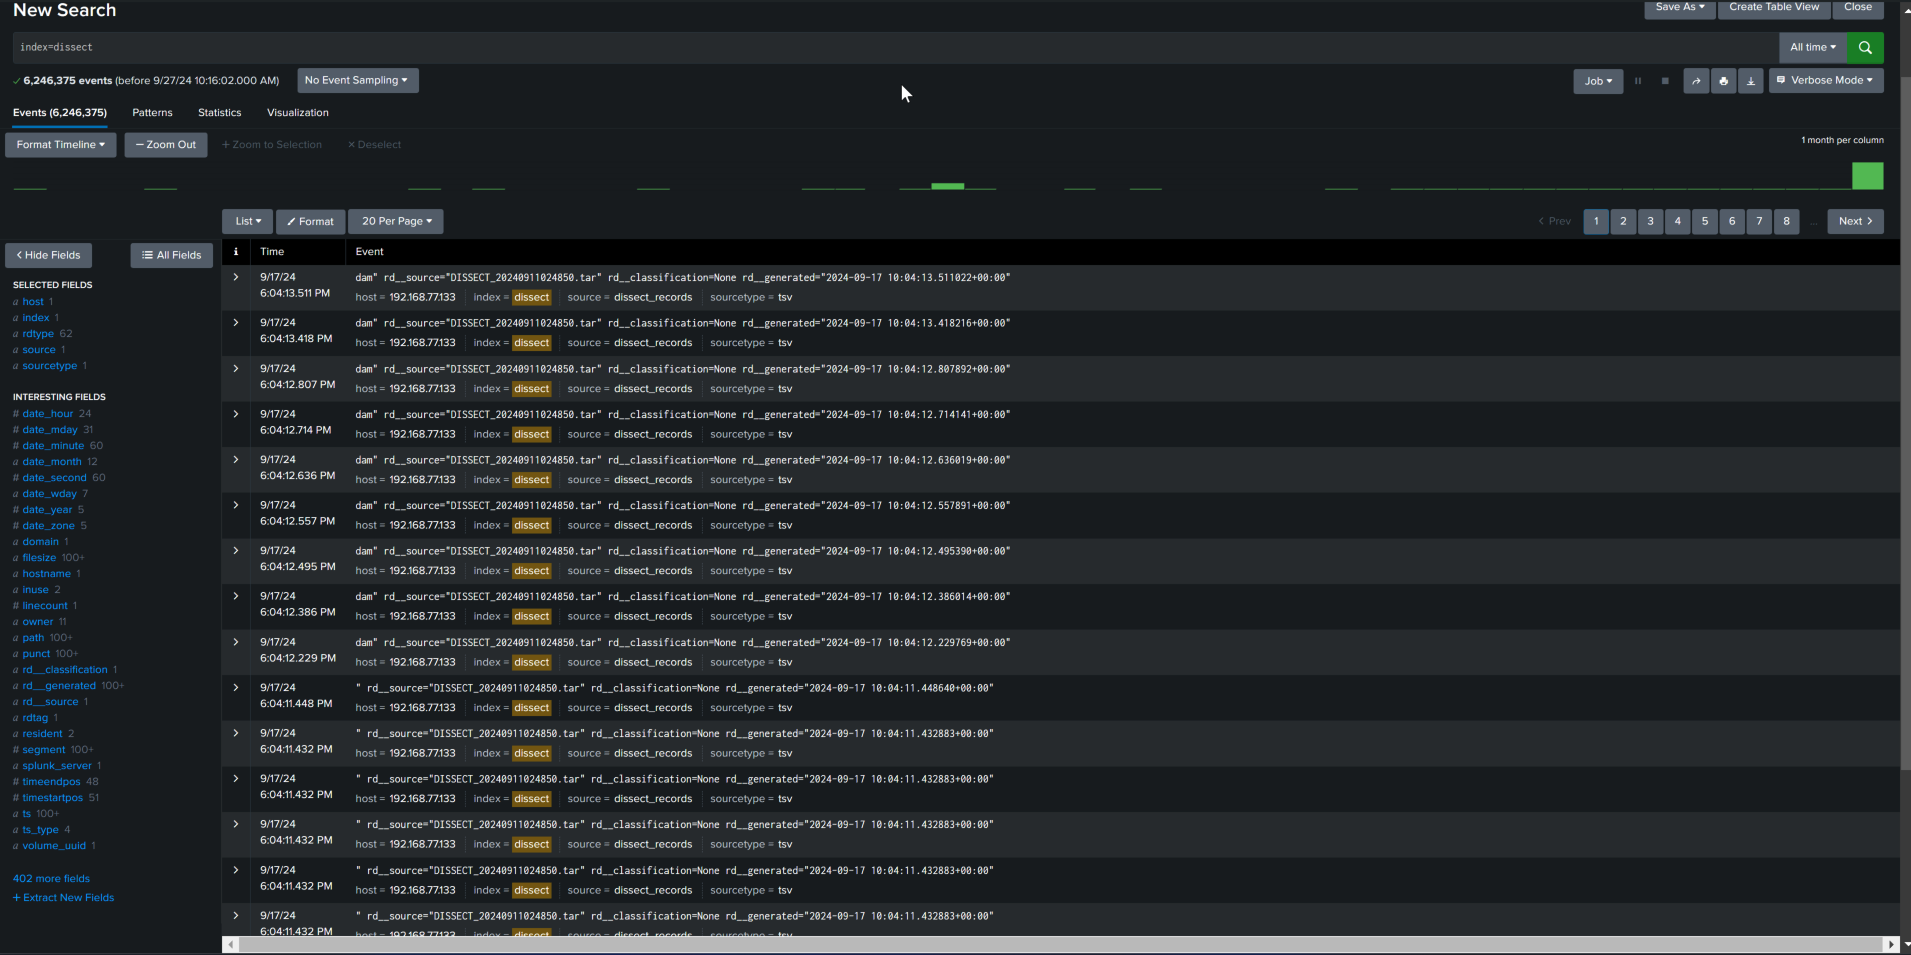
- Data was collected from 1 host.
- Index name used was ‘dissect’.
- Record types (rdtype) were listed as ‘62’, meaning parsed 62 unique records; and
- also parsed 402+ fields. yaay
-
Analyze.
-
???
-
Profit.

Personal thoughts
I basically “brute-forced” my way of creating data and exporting it to the log server. I know this is not the actual process. (but hey, if its stupid and it works, it ain’t stupid!)