Setting up your Cyber Lab
(locally)
What you need
ISO of the following OS:
- Kali Linux
- Windows Server for ActiveDirectory
- Endpoint machine for the User Host (Windows and/or *nix)
- Endpoint machine for Server Host (Windows and/or *nix)
- SIEM
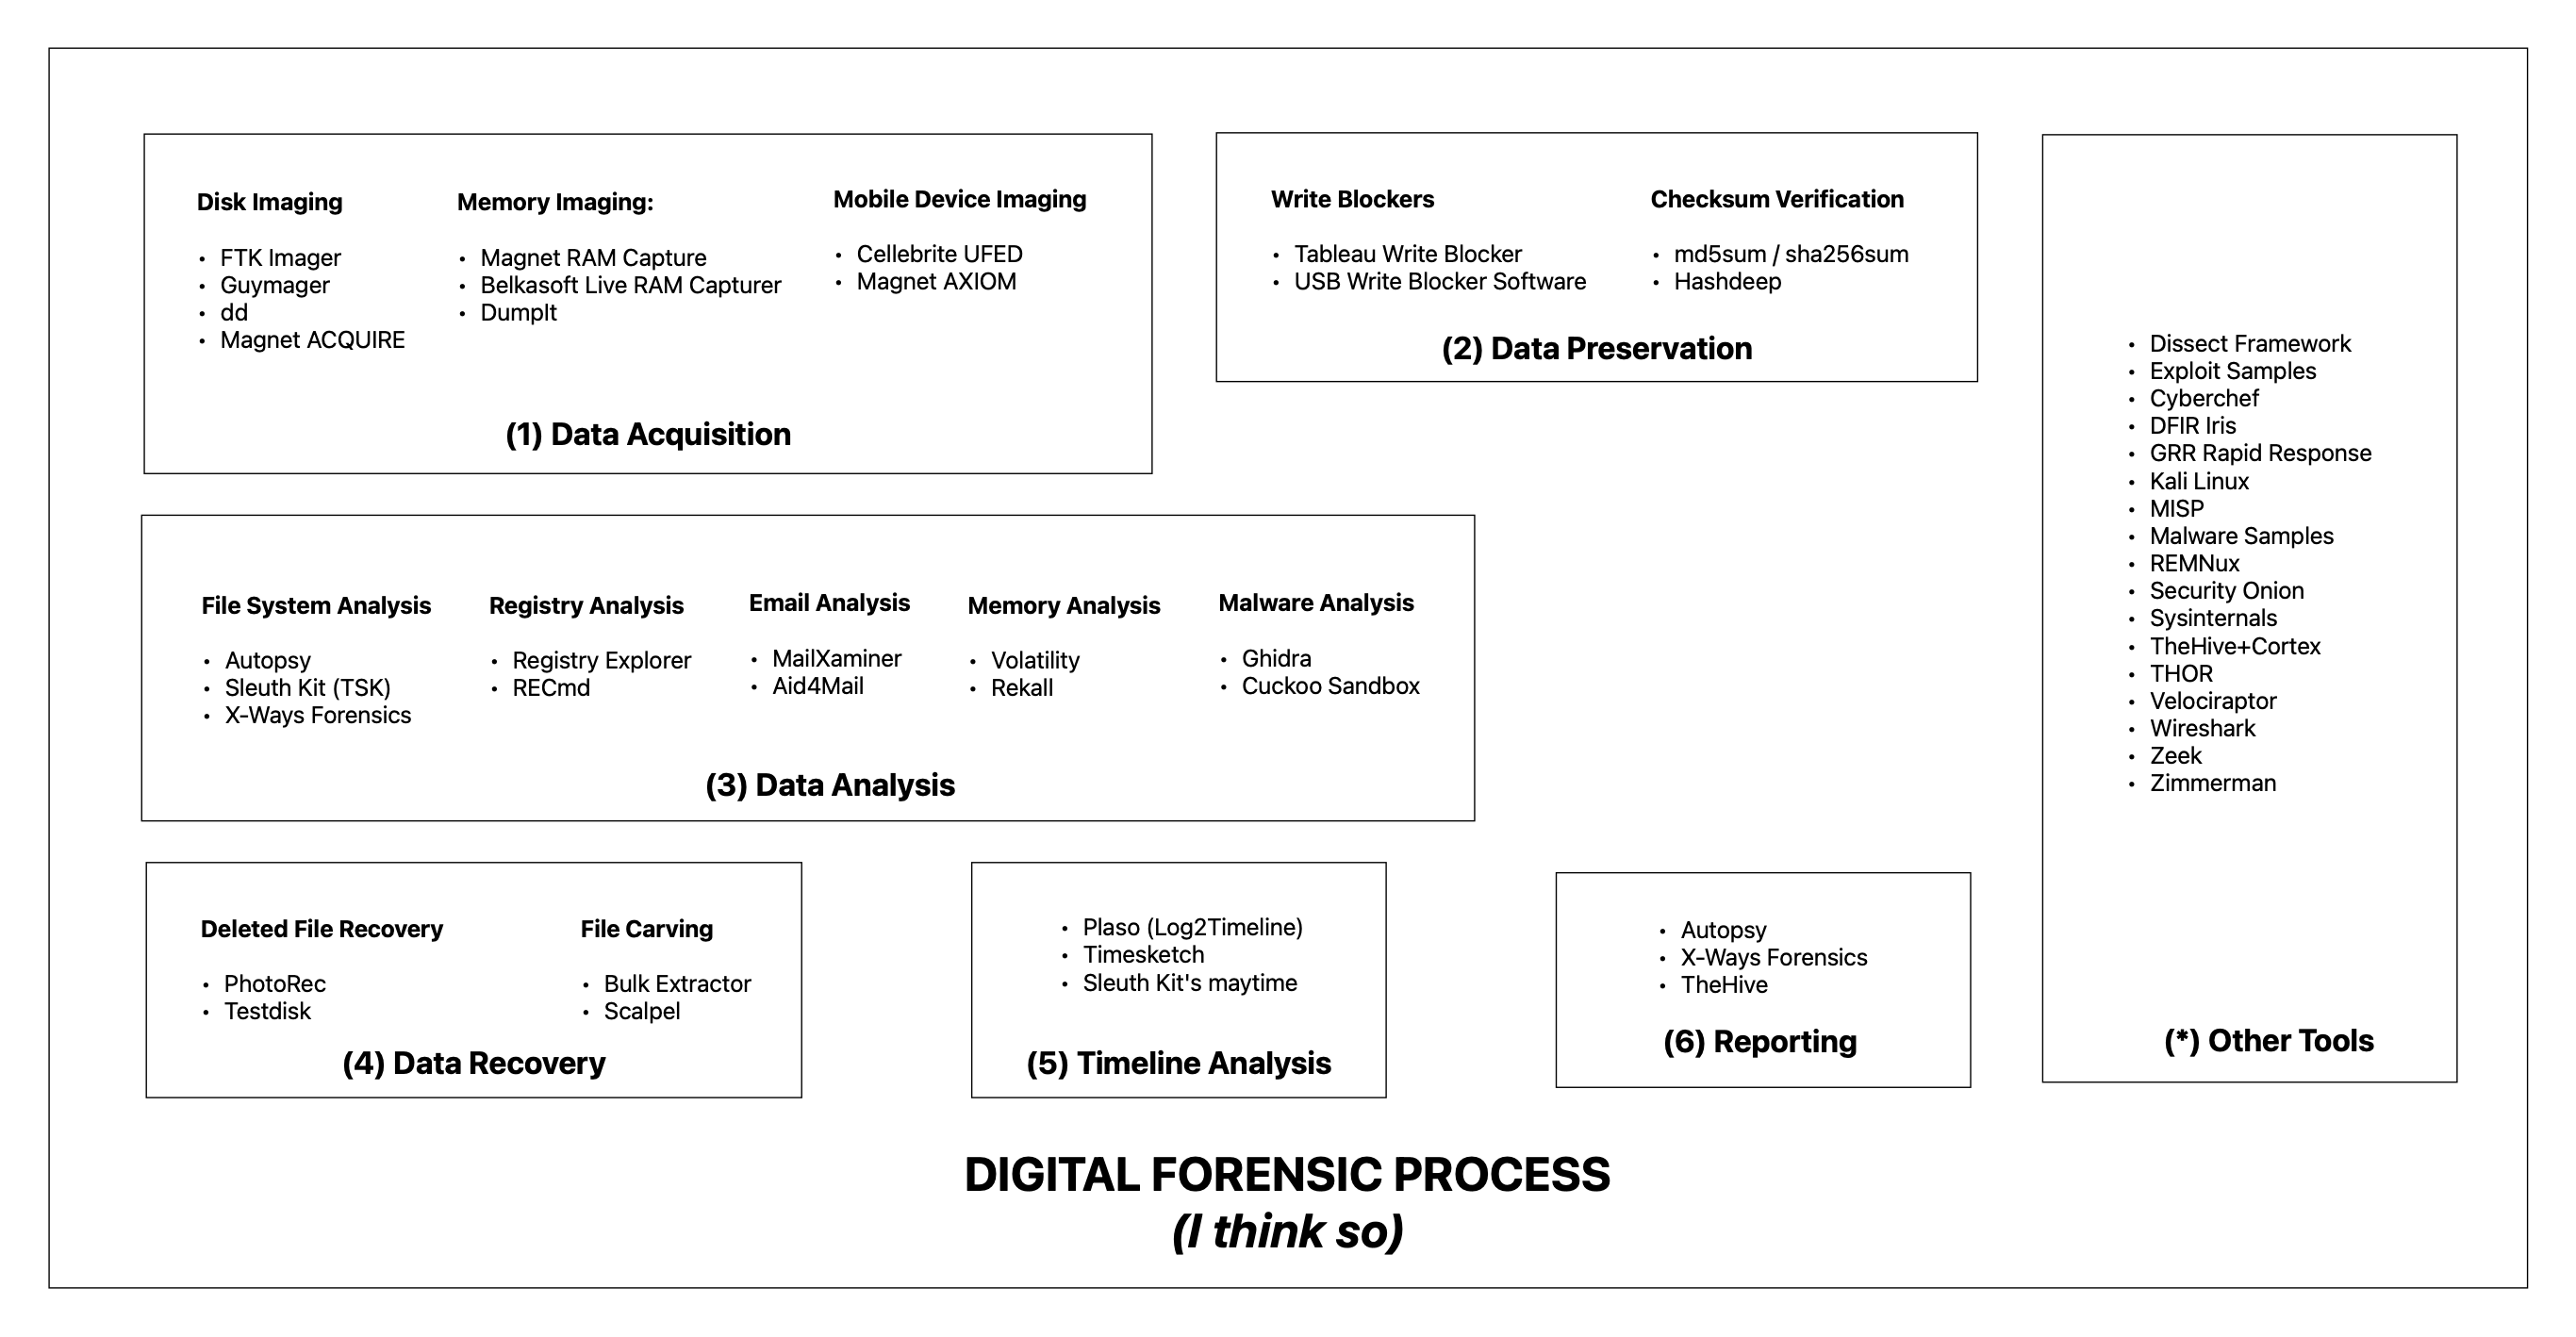
Some other forensic/incident response tools to consider:
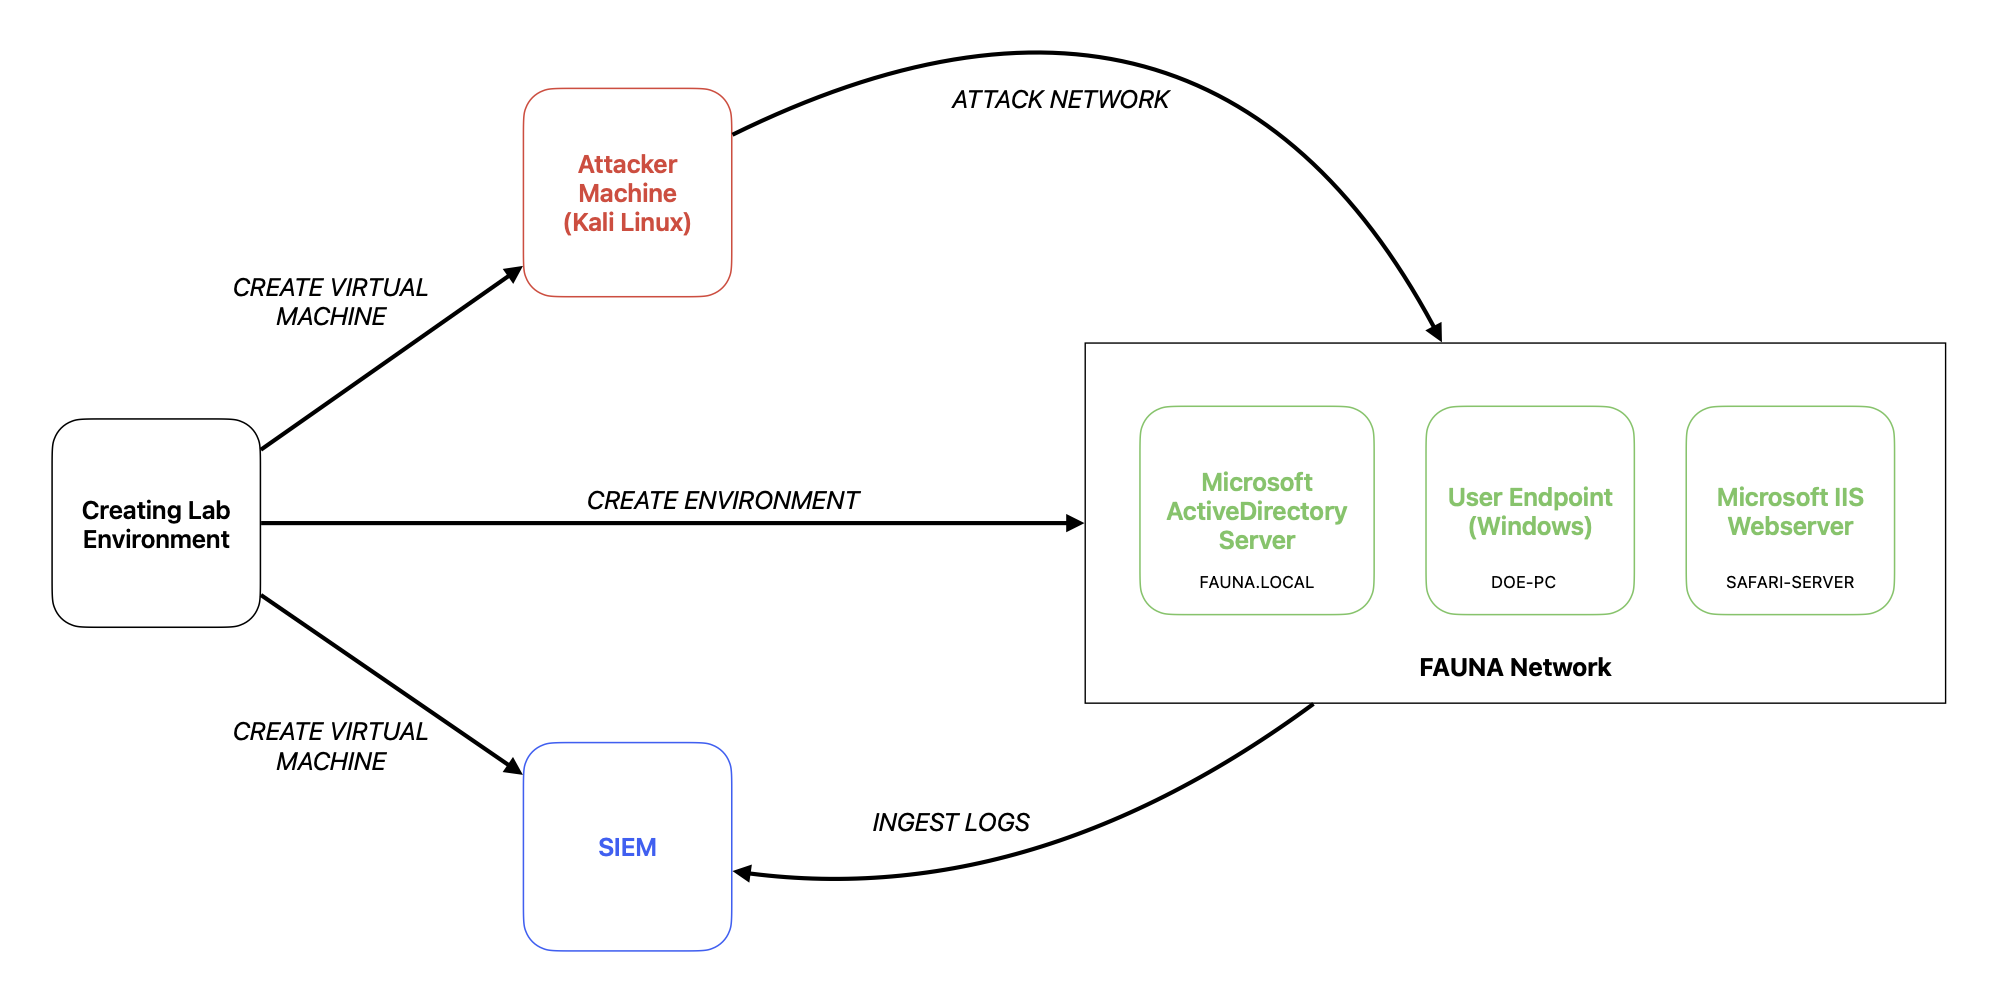
So, first things first. Resources.
Here’s what I did with my virtual machines. I setup the AD, User Host, and the Server as minimum specs. Put below minimum for the Attacker Machine, and created the SIEM with standard specs. So by specifications, I meant:
| Below Minimum | Minimum | Standard | |
|---|---|---|---|
| Processor | 2 cores | 4 cores | 8 cores |
| Memory | 2 GB | 4 GB | 8 GB |
| Storage | 20 cores | 100 GB | 100 GB |
I did it this way to efficiently allocate resources since I’m not running much programs with the virtual machines running the minimum amount. As for the Kali Linux, well, its Linux it won’t need more than that. But for the SIEM, I put in the standard since this is where the whole thing will be happening. From ingesting, to querying, etc. That being said that’s just me tho. You can do it with your own system.
Now, the let’s get dirty.
Make sure to use the same subnet for the lab environment, otherwise they can’t see each other. Just add another network adapter during virtual machine creation.
Setup the Microsoft AD Server
- Download the ISO from Microsoft (eval version)
- Create minimum specs and setup the server.
- Once the Windows Server has been installed, add the roles.
- Active Directory Domain Services
- Active Directory Lightweight Directory Services
- DNS Server
- Maybe add more if you need other the what’s stated above.
- Wait for the installation and restart the server.
- After booting up, return to the Server Manager and click on the flag with the warning sign (top right of the screen)
- Click Promote this server to a domain controller
- Select Add a new forest then type in your preferred domain (in my case its FAUNA.LOCAL)
- You’ll be signed out after the installation, just log in, et voila. Welcome to your new domain.
- Go to the AD DS and create a new ‘Organizational Unit’ inside the domain you’ve setup earlier. Then add a user or two. Make sure to list it down.
If you want, you can make it static by manually setting up the IP address and the DNS of the AD Server.
Setup the user machine
- Download the Windows 10/Windows 11 ISO from Microsoft site.
- Setup the machine using the minimum specifications.
- Configure the IP address and the DNS of the machine. (DNS should be the IP of the AD server).
- Ping the domain (for example, ping FAUNA.LOCAL) if it fails check the IP address configuration.
- Once connection succeeded, add the machine to the domain.
- Restart.
- Then on the login screen use the credentials as added in 1.F.
- There we go. We are on our way to be a one-man IT department (jk).
Setup the SIEM
Luckily I have a Splunk installer but you can also setup any log repo like ELK some sum.
- Create a virtual machine with standard specs.
- Download the ISO installer for your preferred platform. (I used Windows 11 for this one)
- Install the Splunk using the installer.
- Once the Splunk has been setup and you can log in the web interface:
- Configure the Splunk apps/add-ons like for Windows or Linux.
- Add the receiving port as 9997.
- Add a new index using the Splunk add-on for Windows (in my case I use ‘windows’ as the name of the index)
- Then going back to the AD and the User Machine:
- Install the Splunk Forwarder.
- Make sure to press the ‘Custom Options’ and only select the logs that you need to be ingested in Splunk.
- In the Receiving Index page, type in the Splunk IP address and the port you’ve used in 3.D (in my case its 9997).
- After the installation, edit the inputs.conf by changing the index from ‘default’ to ‘windows’.
- Restart the Splunk.
- Then boom. Splunk logs flowing.
Setup up the attacker machine and simulate an attack (Zerologon Vulnerability)
- Download the ISO from kali.org
- Update and upgrade the packages.
- Install Impacket from Github.
- Download the sample exploit from Github.
- Conduct an Nmap scan on the AD Server.
- Now try to perform the Zerologon exploit.
- Check the SIEM for the logs.
That’s it. That’s basically it.